Update February 9th, 2017. As this post is now two years old, the terms of service of the Twitter API has changed. It is now not recommended to send automated replies based on keyword searches.
March 2nd, 2015 - Ubud, Bali
This week, I'm going to walk through the steps to start automating a Twitter account to perform a variety of useful functions using the Twitter API. You can also view these instructions in the readme file of my Github Repository. If you're not interested in the code, you can just skip to the bottom to see what the bot does.
1. Twitter Account Setup
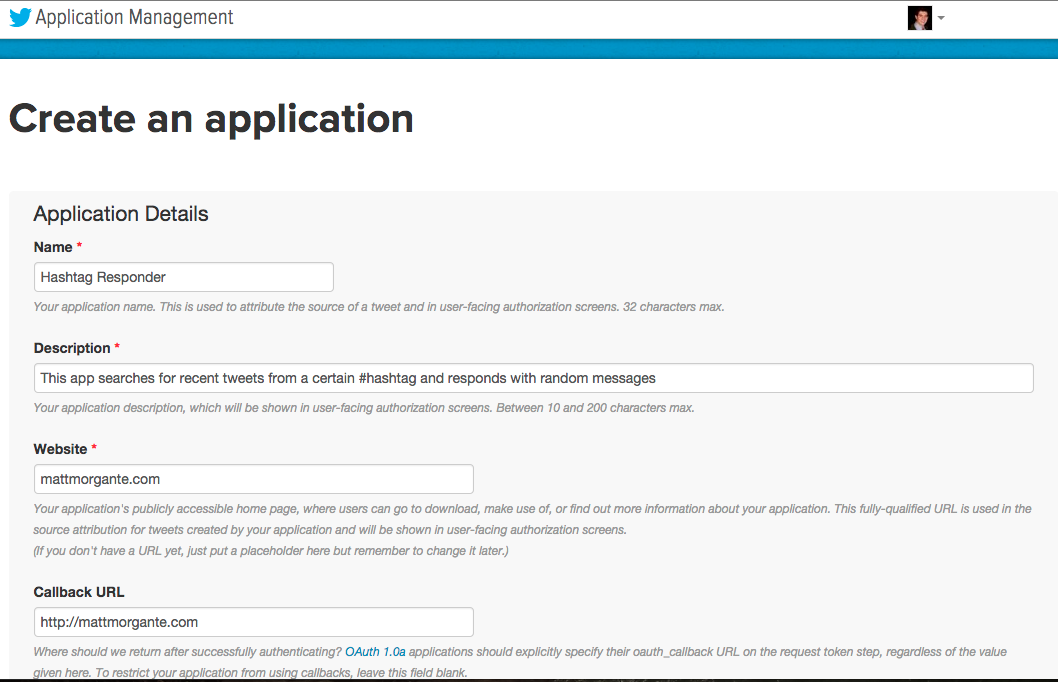
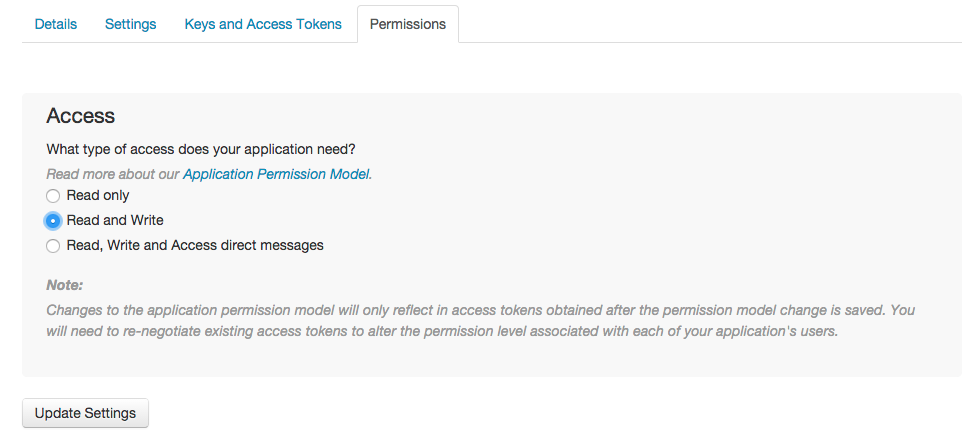
First, go to dev.twitter.com and either sign in to your account or set up a new one. Once signed in, scroll down to "Manage your apps", and you'll be redirected to apps.twitter.com. Click on "Create New App" and fill out the relevant information: In the permissions tab of your newly created application, the access is set to "Read only". This will enable us to retrieve tweets with certain hashtags, but not respond to them, so update the permission to "Read and Write":
Navigate over to "Keys and Access Tokens", where you can view your account's API authorizations ("Consumer Key" and "Consumer Secret"), and initialize Access Tokens for this specific application ("Access Token" and "Access Token Secret"). Save these four unique codes for later.
2. Rails Setup
In your terminal, create a new application. I'm going to call mine hashtagresponder because it's going to find tweets with certain hashtags and respond to them. Specifically, seeing as it's 2:30AM on the East coast right now, I'm going to look for folks who are tweeting with #insomnia and recommend them some of my favorite meditation apps so that maybe they can catch some shut eye.
rails new hashtagresponder
In your brand new rails application add some gems that will make this whole thing possible:
gem 'twitter' gem 'figaro' gem 'randumb'
Then run
bundle install
and
figaro install
Running figaro install creates a new file named application.yml that can hold all of our secret access keys, then appends our .gitignore to ensure that nothing private is uploaded to Github.
3. API Connection
Head over to that newly created file in config/application.yml and add in the four Twitter access keys like so:
consumer_key: "Your access code here" consumer_secret: "Your access code here" access_token: "Your access code here" access_secret: "Your access code here"
Now our app has access to those keys, but we need to ensure they're initialized and called in the correct format. To do so, create a new file in config/initializers named twitter.rb and add the following code that will enable us to begin interacting with Twitter!
CLIENT = Twitter::REST::Client.new do |config| config.consumer_key = ENV['consumer_key'] config.consumer_secret = ENV['consumer_secret'] config.access_token = ENV['access_token'] config.access_token_secret = ENV['access_secret'] end
This instantiation connects us to Twitter with the keys that we've secretly hidden in application.yml. So bfore we do anything more complicated, it would be wise to test the connection to Twitter, which we can do by running
ENV['consumer_key']
in the Rails console. It should respond with your unique consumer_key, matching the value at apps.twitter.com. If it doesn't stop and debug here before moving forward.
4. The Bot Model
Now we're going to create a model that will handle most of the code for our application.
rails g model bot
Don't forget to:
rake db:migrate
In the newly created Bot model (found in app/models/bot.rb), we can write our first method that can access Twitter! It will search through recent tweets, looking for whatever words we pass through it.
def self.search_words words CLIENT.search(words, lang: "en").first.text end
For example, in the Rails Console we can now run "Bot.search_words "#insomnia" and our machine should return the text of the most recent tweet containing that tag.

Now that we've mastered retrieving data, let's switch focus to sending Tweets.
5. Set up your seeded responses
We're going to use a populated database to automatically respond using Rails Seeds file. First create a model to hold all of your responses, using
rails g model Response message: string
and don't forget to rake db:migrate. Then in db/seeds.rb, we can add some Tweets. We're going to randomly loop through these later on, so order doesn't really matter, but make sure all of your messages are less than 140 characters. I'm going to set up my seeds to share a recent New York Time article highlighting mindfulness meditation's effect on sleep and recommend some of my favorite meditation apps.

Once you've populated your seeds file, run rake db:seed
Finally, we're going to create a database to store our Users. This will enable us to store all of their information if we want to engage with them later on, but it actually won't be vital for the purposes of this initial application.
rails g model User name:string tweet_id:string
and, of course...rake db:migrate.
Our application's databases and configuration is completely set. Now it's just time to add some methods to our Bot Model so we can begin wreaking havoc on the internet.
6. Search and Respond
First, we'll set up a respond method build a response to a particular user. In bot.rb,
def self.respond name "@" + name + " " + Response.order_by_rand.first.message end
This method alone actually isn't much use, but when we call it inside another method it will respond with "@username [the tweet from seeds will go here]".
Second, we need a method that will search through tweets and save a certain number of them, create and save a user for each tweet, and finally Tweet out a response in respond to the saved response. Sound complicated? Well, yea, it is, but maybe the commented out sudo code will help you understand it:

Now we can head over to the Rails Console and call our newly created method by running "Bot.find_user 3, "#insomnia" and our Twitter account should reply to the three most recent tweets with that hashtag.

The machine's response indicated that we've inserted three new users into our user database. We've also sent off three replies to users. Don't believe me? Check it out: you can see that my seeds file randomly populated with three different responses:

Although I'm just messing around and creating a basic Robot responder, this opens up a whole world of interesting possibilities. One could use an automated responder to A/B test click-through rates on promotional content or evaluate conversion rates on various landing pages. More broadly, with a basic understanding of Twitter's API configuration, one can automate key functions, develop an entire social media campaign, or even build and access custom analytics reports.
If you're interested in learning more about unleashing the power of API's using Ruby, CodeAcademy has a great track. http://www.codecademy.com/en/tracks/twitter